Securing Reactjs Application with Firebase: User Authentication and Protected Routes Explained

React Firebase Authentication

This blog post is about Firebase authentication using Reactjs where we will build a login system where user can create an account or use their email id to log in. We will be using bootstrap & react-bootstrap as well.
In this blog post, we will learn how to create a protected route, how to set user details in context api, and sign in the user with an email and password using firebase plus Google sign-in.
First of all, let's create a Firebase project. Go to Authentication tap and select Sign-in-method and add Email/Password and Google by clicking Add new provider.
Find your SDK setup and configuration and copy it.
Now, it is time to create-react-app. Create a new react app by running the following command
npx create-react-app firebase-auth
Once the app is up and running let's install all packages we need for this app.
npm i firebase react-router-dom bootstrap react-bootstrap react-google-button
Create a new fireConfig.js file and paste copied firebase sdk. It should have the following code:
import { initializeApp } from "firebase/app";
import {getAuth} from "firebase/auth";


const firebaseConfig = {
  apiKey: "",
  authDomain: "",
  projectId: "",
  storageBucket: "",
  messagingSenderId: "",
  appId: "",
  measurementId: ""
};

// Initialize Firebase
const app = initializeApp(firebaseConfig);

const auth = getAuth(app);

export {auth};
export default app;
Here, we have exported {auth} from the config file.
Let's quickly set up react-router and create Login and Signup pages.
Add the following code in index.js file:
import React from 'react';
import ReactDOM from 'react-dom/client';
import { BrowserRouter } from 'react-router-dom';
import App from './App';
import 'bootstrap/dist/css/bootstrap.min.css'
import "bootstrap/dist/js/bootstrap.bundle.min";
const root = ReactDOM.createRoot(document.getElementById('root'));
root.render(
  <React.StrictMode>
    <BrowserRouter>
    <App />

    </BrowserRouter>
  </React.StrictMode>
);
Here, we just imported react-bootstrap and BrowserRouter from react-router-dom and wrapped our main App component inside BrowserRouter.
In App.js file add following code:
import React from 'react';

import Navbar from './components/Navbar';
import Login from './components/Login';
import Signup from './components/Signup';
import Home from './components/Home';
import Profile from './components/Profile';
import { Route ,Routes} from "react-router-dom";

function App() {
  return (<>

    <Navbar/>
    <Routes>

 <Route  path='/' element = {<Home/>}/>

<Route path = "/login" element ={<Login/>} />

<Route path = "/signup" element = {<Signup/>} />


<Route path='/profile' element = {<Profile/>} />

    </Routes>


    </>
  );
}

export default App;
In the above code, we have imported Navbar component at the top and set up routes for Home page, Login page, Signup page, and Profile page. We will look into each of these pages in detail latter.
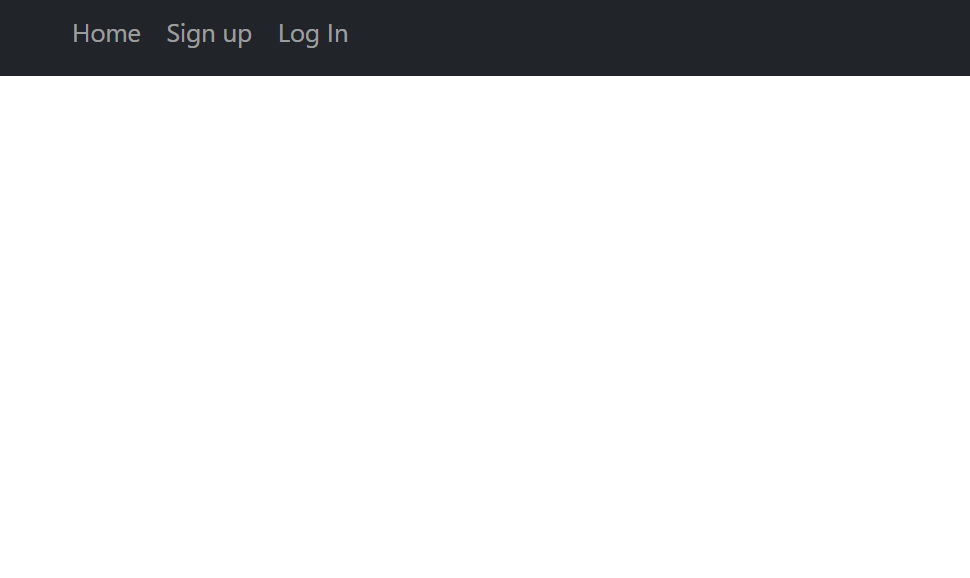
Navbar
Navbar component will have links for different pages of our application. Let's add the following code in `components/Navbar.js
import React from 'react';
import {Link} from "react-router-dom";

import Container from 'react-bootstrap/Container';
    import Nav from 'react-bootstrap/Nav';
    import Navbar from 'react-bootstrap/Navbar';

    function Navigation() {

      return (<>
        <Navbar collapseOnSelect onSelect expand="lg" bg="dark" variant="dark">
          <Container>

          <Navbar.Toggle  aria-controls="responsive-navbar-nav" />
          <Navbar.Collapse  id="responsive-navbar-nav">

              <Nav   className="me-auto">
              <Link className='nav-link' to = "/">Home</Link>
            <Link  className = 'nav-link 'to = "/Signup">Sign up</Link>
<Link className='nav-link' to = "/login">Log In</Link>
</>
)}


  </Nav>
          </Navbar.Collapse>


          </Container>
        </Navbar>
        </>
      );
    }


export default Navigation;
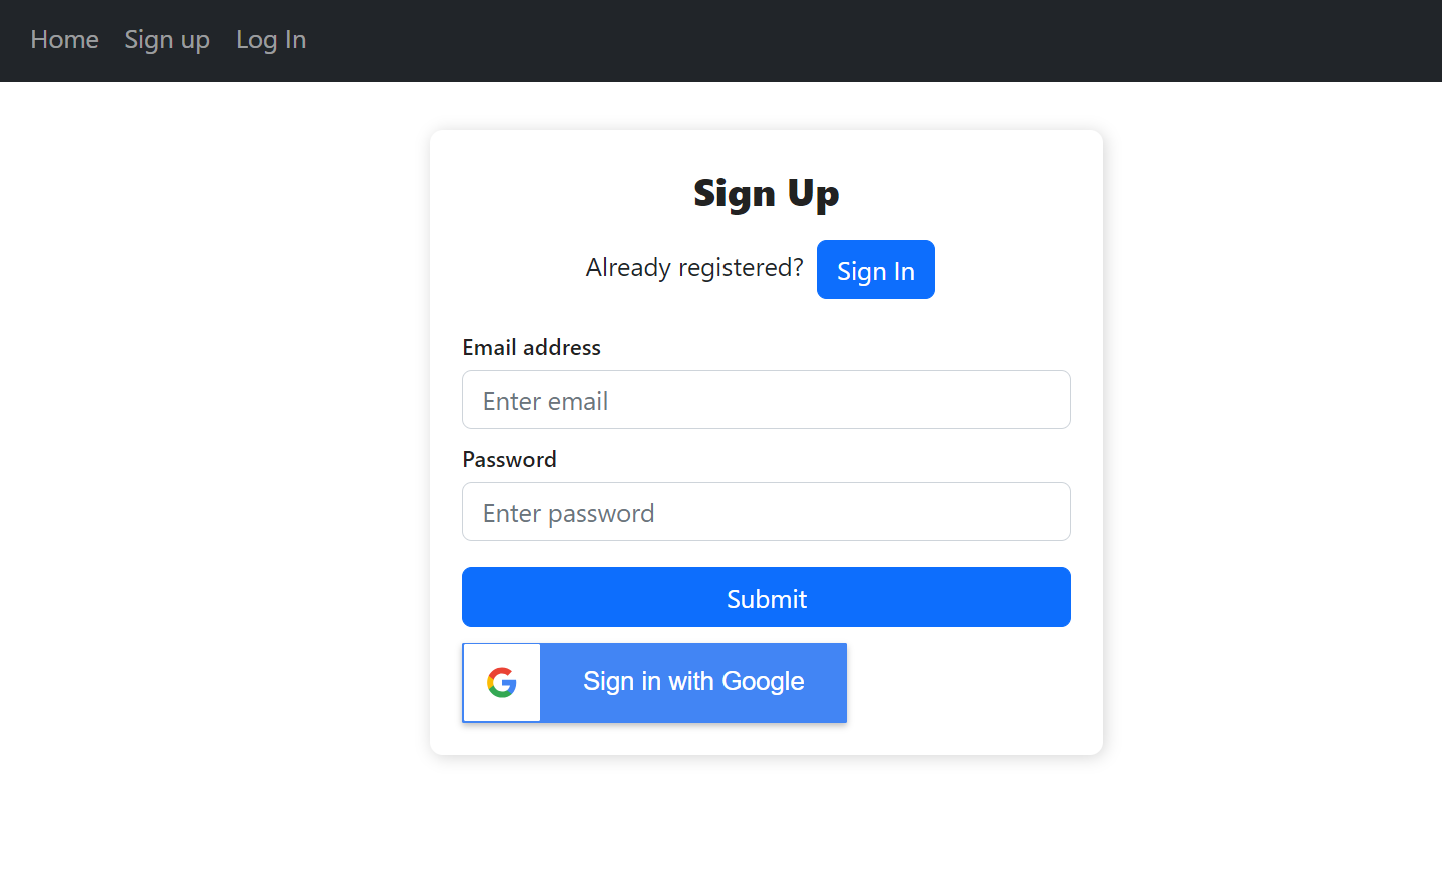
Sign up page
Now, create a folder name components and inside that folder add Signup.js file. Signup.js file will have a form where user can enter their email id and password or user can signup using their Google account directly as well and they will be redirected to the profile page. To allow the user to sign up using email and password, we need createUserWithEmailAndPassword method from firebase/auth and for gmail login we need GoogleAuthProvider and signInWithPopup methods.
import React, { useState } from "react";
import { Link, useNavigate } from "react-router-dom";
import { createUserWithEmailAndPassword,GoogleAuthProvider,  signInWithPopup } from "firebase/auth";
import { auth } from "../fireConfig";
import {GoogleButton} from "react-google-button"

const Signup = ()=>{
const[disabled,setDisabled] = useState(false);
const navigate = useNavigate();
const [user,setSignUser] = useState({
  email: "",
  password: ""
});

const [error, setError] = useState(null)

const inputHandeler = (e)=>{
  setSignUser({...user,[e.target.name]:e.target.value})
}

const signInWithGoogle = async()=>{
    const provider = new GoogleAuthProvider();
  try{
await signInWithPopup(auth,provider);
navigate("/profile");
setError("");
  } catch(er){
    setError(er.message)
  }
}


const  formHandeler = async (e)=>{
  e.preventDefault();
setDisabled(true);
  if( user.email.trim() === "" || user.password.trim()=== "")
  {setDisabled(false);
    return (setError("All fields are required to fill"))}
try{
   await createUserWithEmailAndPassword(auth, user.email,user.password);

setSignUser({
  email: "",
  password: ""
})
setError(null)
navigate("/profile");

}catch(er){
setError(er.message)
}
setDisabled(false)
}
    return( <>
    <div className="form-container">
      <div className="Auth-form">
        <h3 className="Auth-form-title m-1">Sign Up</h3>
        <div className="text-center m-2">
        Already registered?
              <span className="link-primary btn-group m-2">
              <Link  className = 'btn btn-primary'to = "/login">Sign In</Link>
              </span>
              {error && <div className="”alert error"> {error} </div>}

            </div>

            <form>
        <div className="form-group mt-1">
          <label>Email address</label>
          <input
            type="email" onChange={inputHandeler} value={user.email} name = "email"
            className="form-control mt-1"
            placeholder="Enter email"
          />
        </div>
        <div className="form-group mt-1">
          <label>Password</label>
          <input
          onChange={inputHandeler}
            type="password" value={user.password} name = "password"
            className="form-control  mt-1"
            placeholder="Enter password"
          />
        </div>
        <div className="d-grid gap-2 mt-3">
          <button disabled = {disabled} type="submit"onClick={formHandeler} className="btn btn-primary">
            Submit
          </button>
        </div>
    </form>

              <div className="btn-group">
          <GoogleButton onClick = {signInWithGoogle}/>
         </div>
      </div>
  </div>

</>
    )}


export default Signup;
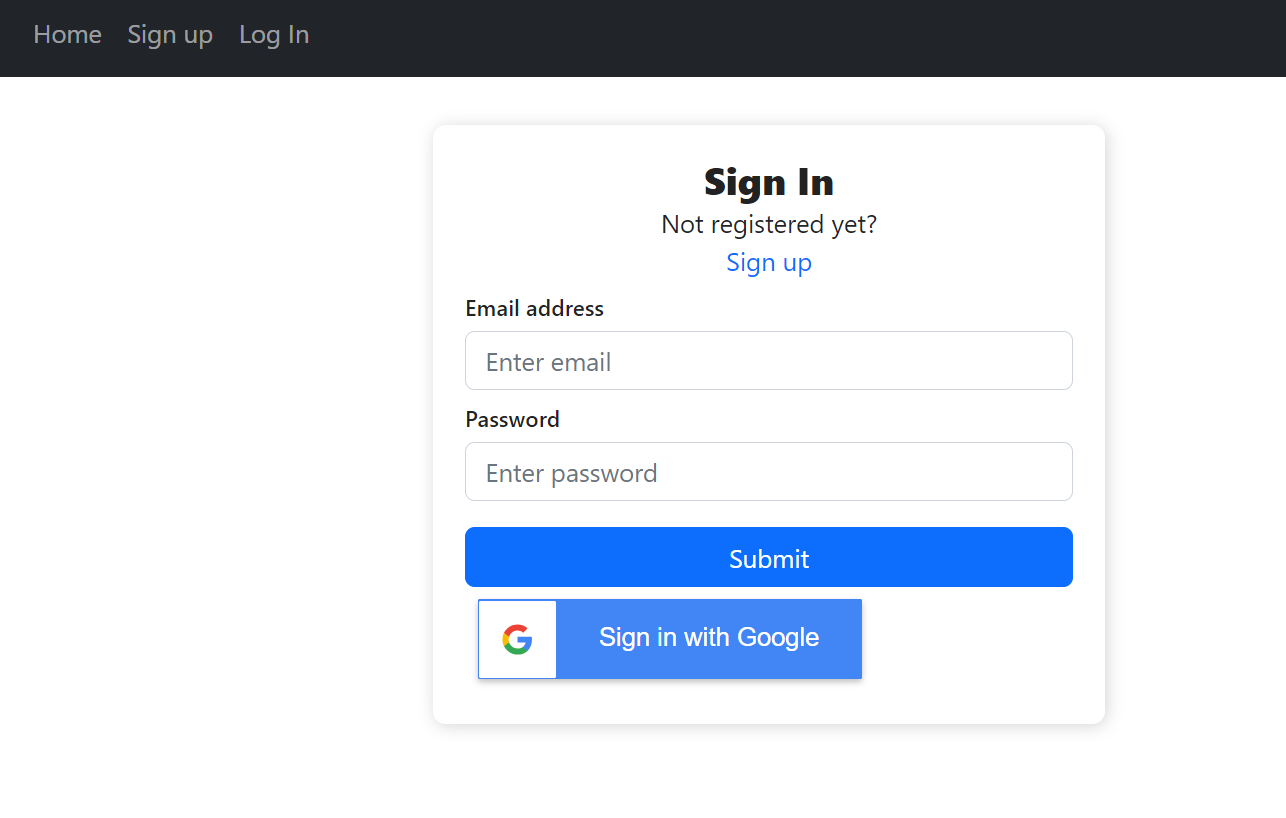
Login page
Login page will have a form where user can type thier email and password or user can login directly using their Gmail id. To allow user to login we need signInWithEmailAndPassword method from firebase/auth
import React, {useState } from "react";
import { Link, useNavigate } from "react-router-dom";
import { signInWithEmailAndPassword, GoogleAuthProvider, signInWithPopup} from "firebase/auth";
import{auth} from "../fireConfig";
import GoogleButton from "react-google-button";

const Login = ()=>{
const[disable,setDisable] = useState(false);
const navigate = useNavigate();
const [error, setError] = useState(null)
const [user,setLoginUser]= useState({
  email:"",
  password:""
})

const changeHandeler = (e)=>{
setLoginUser({...user, [e.target.name]:e.target.value})

}

const googleLogin = async ()=>{
    const provider = new GoogleAuthProvider();
  try{
await signInWithPopup(auth,provider);
navigate("/profile");
setError("");
  } catch(er){
    setError(er.message)
  }

}

const formHandeler = async (e)=>{
  e.preventDefault();
setDisable(true);
if(user.email.trim()=== "" || user.password.trim()=== ""){
  setDisable(false)
  return setError("All fields are required to fill");
}

try{

  await signInWithEmailAndPassword(auth,user.email,user.password)

  setLoginUser({email:"",
  password:""})
  setError(null);
  navigate("/profile");
}catch(er){

  setError(er.message);
}
setDisable(false);
}

    return( <div className="form-container">

      <div className="Auth-form">
    <form >

        <h3 className="Auth-form-title m-0">Sign In</h3>
        <div className="text-center">
              Not registered yet?
              <span className="link-primary">
              <Link  className = 'nav-link'to = "/Signup">Sign up</Link>
              </span>

            {error && <div className="”alert error"> {error} </div>}
            </div>
        <div className="form-group mt-1">
          <label>Email address</label>
          <input
            type="email"
            name="email"
            value={user.email}
            onChange = {changeHandeler}
            className="form-control mt-1"
            placeholder="Enter email"
          />
        </div>
        <div className="form-group mt-1">
          <label>Password</label>
          <input
          name="password"
          value={user.password}
          onChange = {changeHandeler}
            type="password"
            className="form-control  mt-1"
            placeholder="Enter password"
          />
        </div>
        <div className="d-grid gap-2 mt-3">
          <button type="submit" disabled ={disable} onClick={formHandeler} className="btn btn-primary">
            Submit
          </button>
        </div>
    </form>
    <GoogleButton className="m-2" onClick={googleLogin}/>
      </div>

  </div>)

}

export default Login;
Storing and accessing user details using React Context API
We want to access user details inside our components tree. We can achieve this by using context API. Create a new file named AuthContex.js and add following code
import React, {useContext, useState, useEffect} from "react";

import { onAuthStateChanged} from "firebase/auth";
import { auth } from "../../fireConfig";

 const AuthContext = React.createContext();

 const AuthProvider = ({children})=>{

  const [user, setUser]= useState(null);
  useEffect(()=>{

   const unscribe = onAuthStateChanged(auth,(user)=>{
      setUser(user);
  })
  return unscribe;

  },[])


    return(<AuthContext.Provider value = {{user}}>

        {children}
    </AuthContext.Provider>)
}
 const useAuth = ()=>{
    return useContext(AuthContext);
}

export{AuthProvider, useAuth};
Here, We have imported onAuthStateChanged method which allows to subscribe to the current user's authentication state and receive an event if the state changes.
Protected route
We want to protect /profile route. User only can access that route if they are logged in. Create a file ProtectedRoute.js file and add following code.
import React from "react";
import { useAuth } from "./AuthContext";
import { Navigate } from "react-router-dom";

 const ProtectedRoute = ({children})=>{
const {user}= useAuth();
if(!user){
    return <Navigate to="/" replace ={true}/>
}

return children;
}

 const RedirectRoute = ({children})=>{
const {user} = useAuth();
if(user){
    return <Navigate to = "/profile" replace = {true}/>
}

return children;
}
export {ProtectedRoute, RedirectRoute};
In the above code, we have exported two functions ProtectedRoute which will simply redirect user to home page if user is not logged in and RedirectRoute which will redirect user to profile page if they are logged in and try to go to Login page or Sign up page. Now we have to modify our App.js file.
import {AuthProvider} from "./components/contexts/AuthContext";
import {ProtectedRoute, RedirectRoute} from "./components/contexts/ProtectedRoute";

function App() {
  return (<>

<AuthProvider>
    <Navbar/>

    <Routes>
      <Route  path='/' element = {<Home/>}/>
<Route path = "/login" element ={<RedirectRoute>
<Login/>
</RedirectRoute>
} />

<Route path = "/signup" element = {<RedirectRoute>
  <Signup/>
</RedirectRoute>
  }
   />

<Route path='/profile' element = {

<ProtectedRoute>
  <Profile/>
</ProtectedRoute>

  }>

    </Route>
    </Routes>

    </AuthProvider>
    </>
  );
}

export default App;
In the above code, we have wrapped all components inside AuthProvider so that we can access user details in every component we want to. and Profile component is wrapped inside ProtectedRoute which can be accessed only if the user is logged in.
Profile page
In the profile page we will display Logout button. user can log out by clicking this button and we will display current user email id as well. We have to import SignOut method from firebase/auth which will allow user to log out.
import React, {useState} from "react";
import {useAuth} from "../components/contexts/AuthContext";
import { Button, Modal } from "react-bootstrap";
import { signOut } from "firebase/auth";
import { auth } from "../fireConfig";

const Profile = ()=>{
  const {user} = useAuth();
   const [show, setShow] = useState(false);
   const handleClose = () => setShow(false);
   const handleShow = () => setShow(true);

   const logoutHandler = async ()=>{
       try{
       await signOut(auth);
       }catch(er){
          console.log(er.message);
       }
       }

   return(<>
<div className="container">
  <h2>
  {user.email}
   </h2>
   <Button className="btn btn-secondary" onClick={handleShow}> LogOut</Button>
<Modal  show={show} onHide={handleClose}>
    <Modal.Header closeButton>
      <Modal.Title> User logOut</Modal.Title>
    </Modal.Header>
    <Modal.Body>Do you want to logout?</Modal.Body>
    <Modal.Footer>
      <Button variant="secondary" onClick={handleClose}>
        No
      </Button>
      <Button variant="primary" onClick={logoutHandler}>
        Yes
      </Button>
    </Modal.Footer>
  </Modal>

     </div>
   </>)

}

export default Profile;
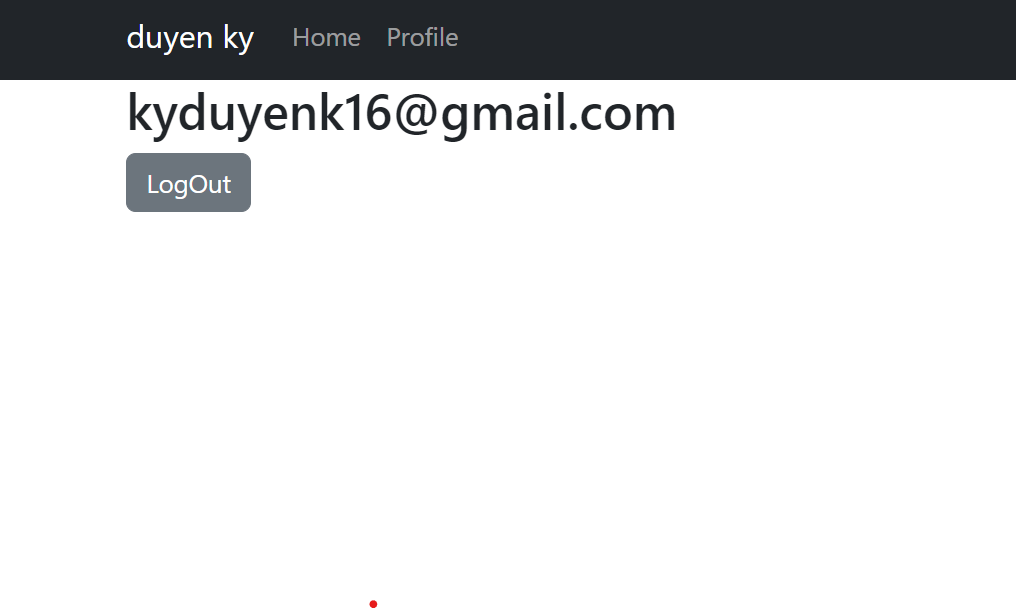
I have modified Navbar component. If user is logged in, link to the Profile page will be seen. Links for Login and Sign up will be hidden. For that add following code in Navbar.js file
 import {useAuth} from "../components/contexts/AuthContext";
    function Navigation() {
const {user} = useAuth();

      return (<>
        <Navbar collapseOnSelect onSelect expand="lg" bg="dark" variant="dark">
          <Container>
                {user && <Navbar.Brand>{user.displayName}</Navbar.Brand>}

          <Navbar.Toggle  aria-controls="responsive-navbar-nav" />
          <Navbar.Collapse  id="responsive-navbar-nav">

              <Nav   className="me-auto">
              <Link className='nav-link' to = "/">Home</Link>
              {user ?  (<Link  className = 'nav-link 'to = "/profile">Profile</Link>):(<><Link  className = 'nav-link 'to = "/Signup">Sign up</Link>
<Link className='nav-link' to = "/login">Log In</Link>
</>
)}


  </Nav>
          </Navbar.Collapse>
    </Container>
        </Navbar>
        </>
      );
    }


export default Navigation;
Conclusion
In this blog post, we learned the process of implementing user authentication in a React application using Firebase. We learned to integrate protected routes and Context API.